Draw hierarchically by starting out simple, layering on details as you go. Use a new layer (TIP 3) for each step of detail and you can lock down the information once it is defined. Using this technique, you will be focused on each level of information, producing a detail rich diagram.
Example 15-1
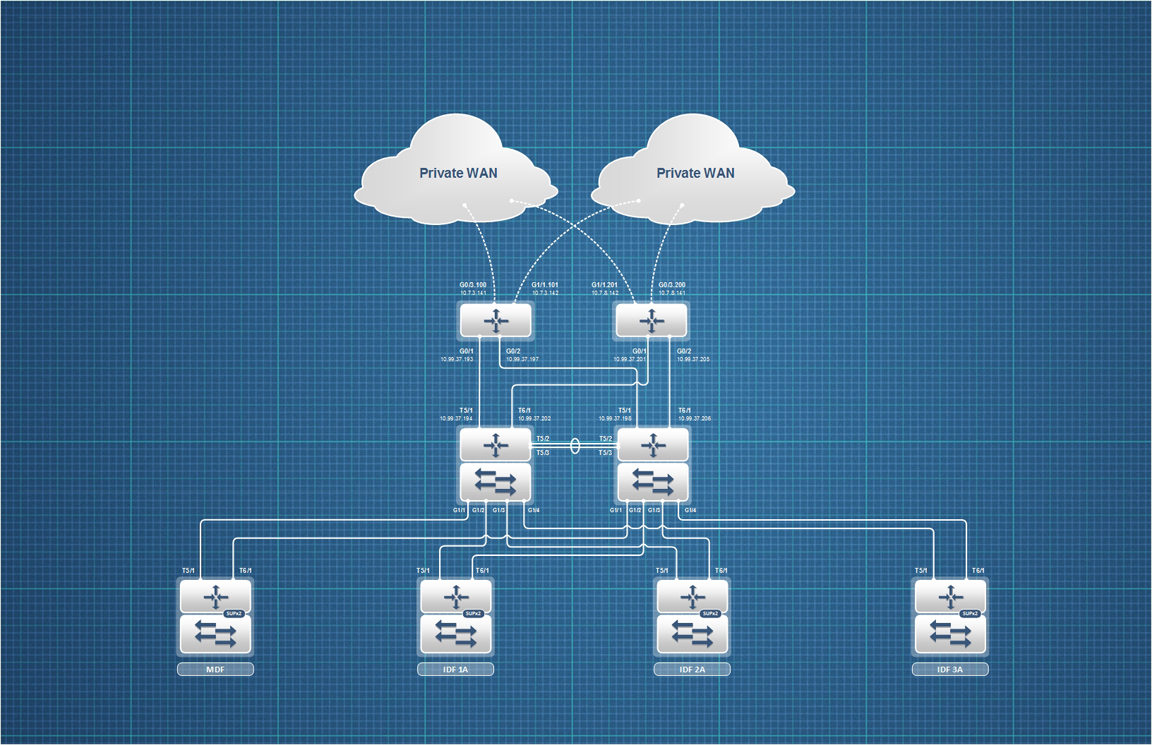
Lay out your primary components such as WAN clouds, routers, switches, and firewalls. Keep them spaced apart with enough room to add data later. Symmetry and balance is important, so it is easier to do layout changes before adding any links between the icons.
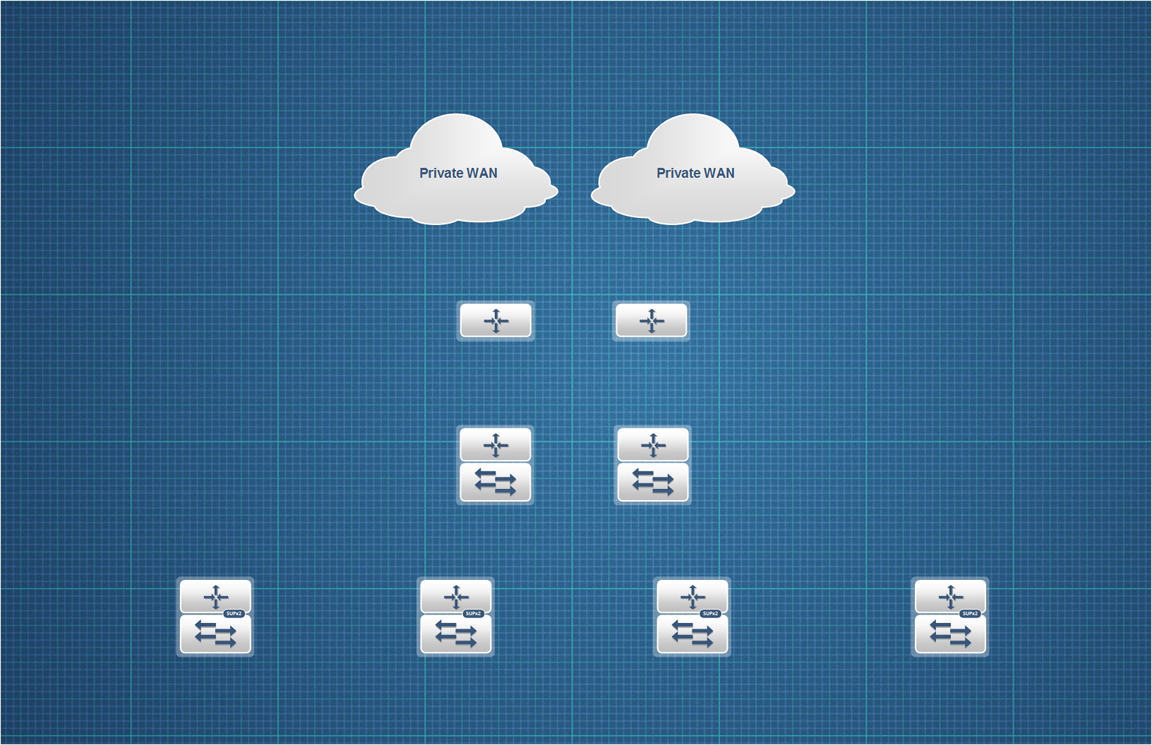
Example 15-2
Add connectors, keeping them nicely spaced and symmetrical when possible.

Example 15-3
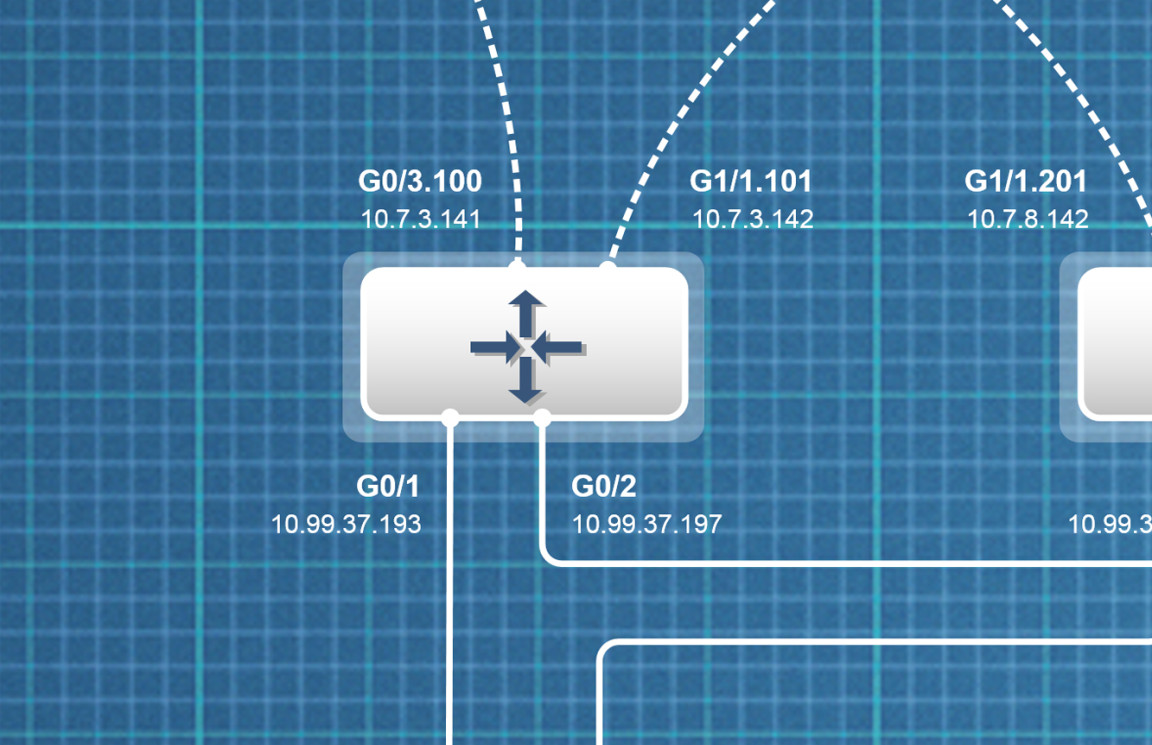
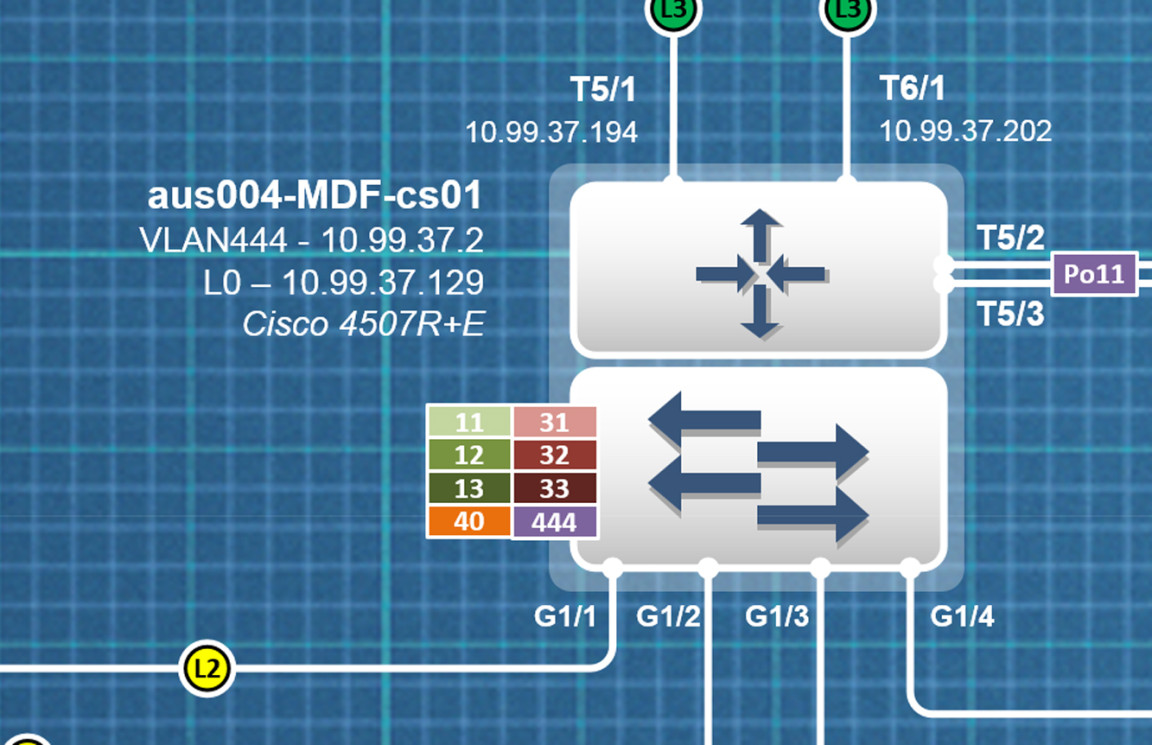
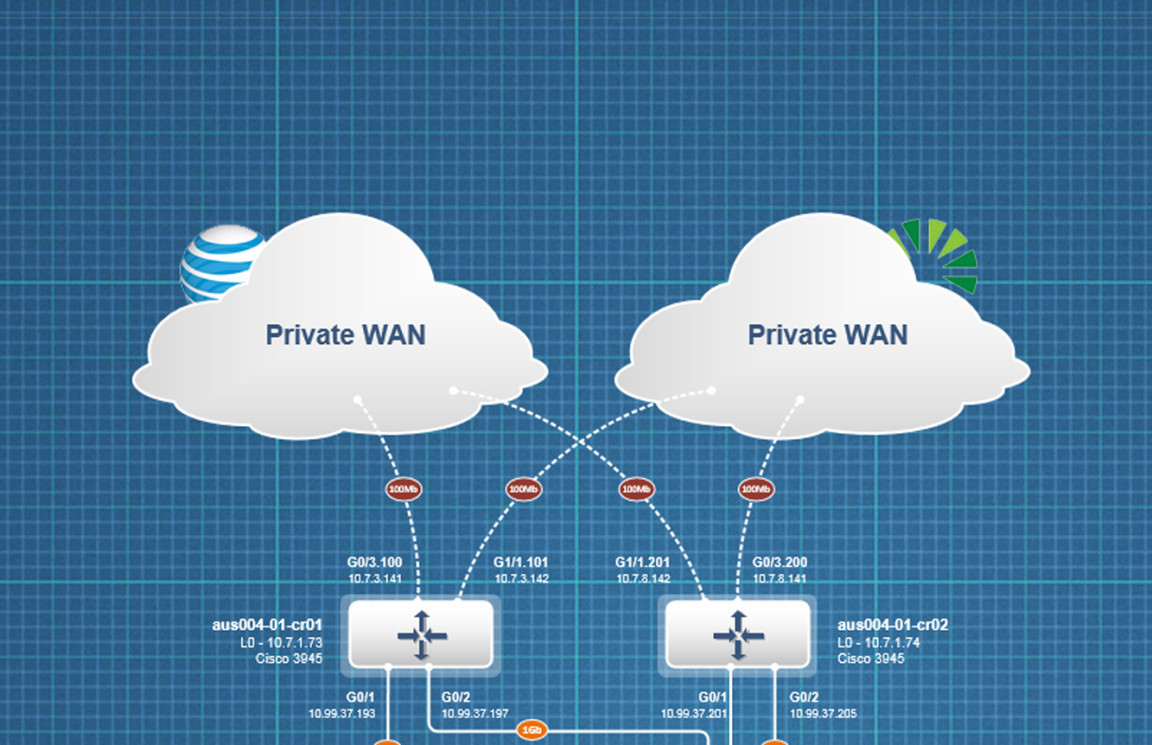
Next, add interface names, hardware location, and L3 addresses. Keep it simple and abbreviate in order to conserve space.
Example 15-4
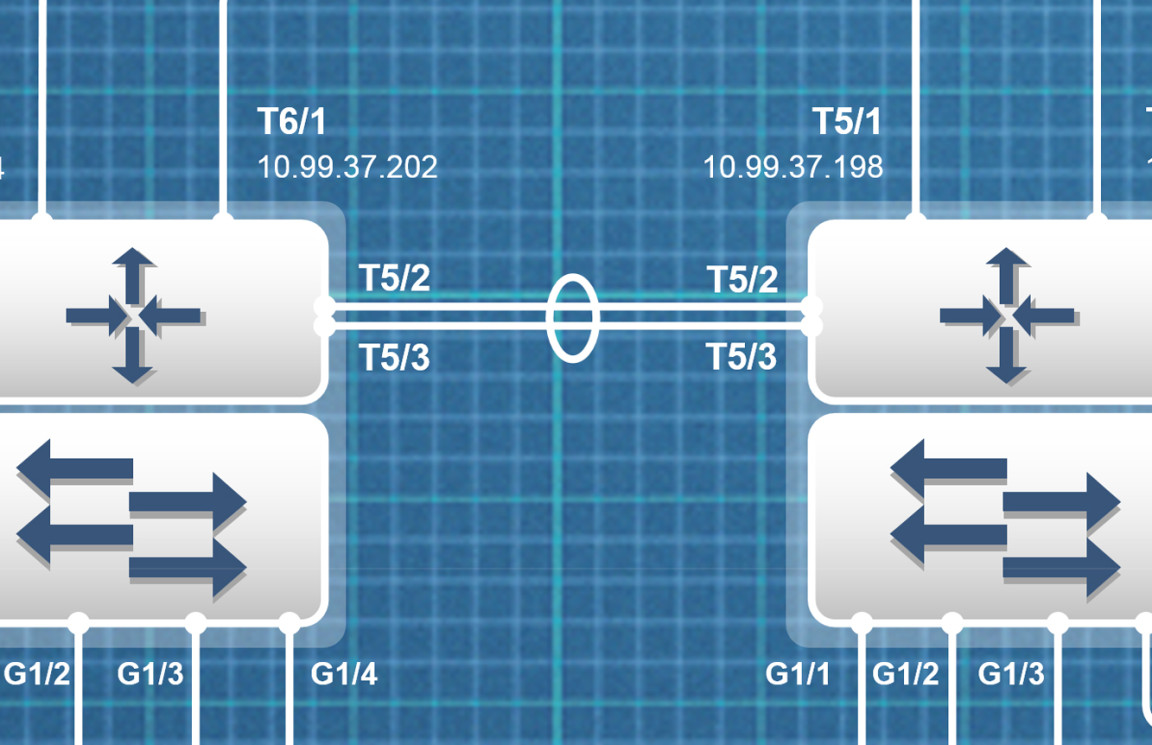
Add speed, L2/L3, and VLAN ID information.
Example 15-5
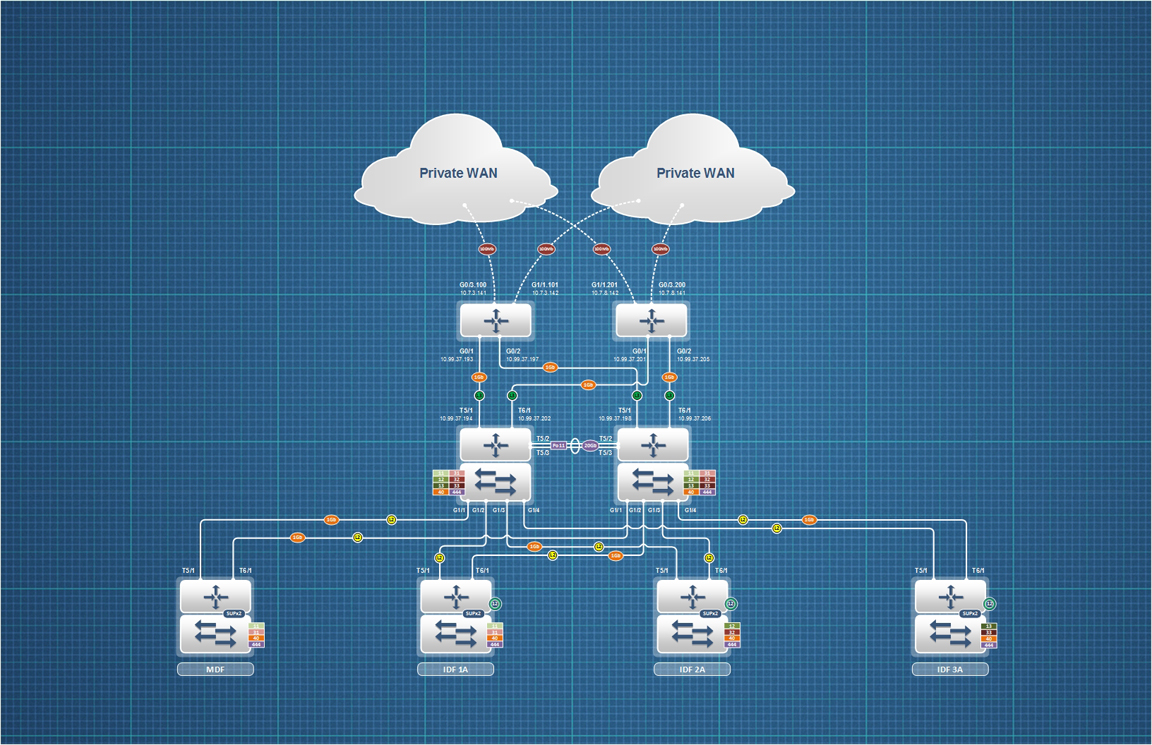
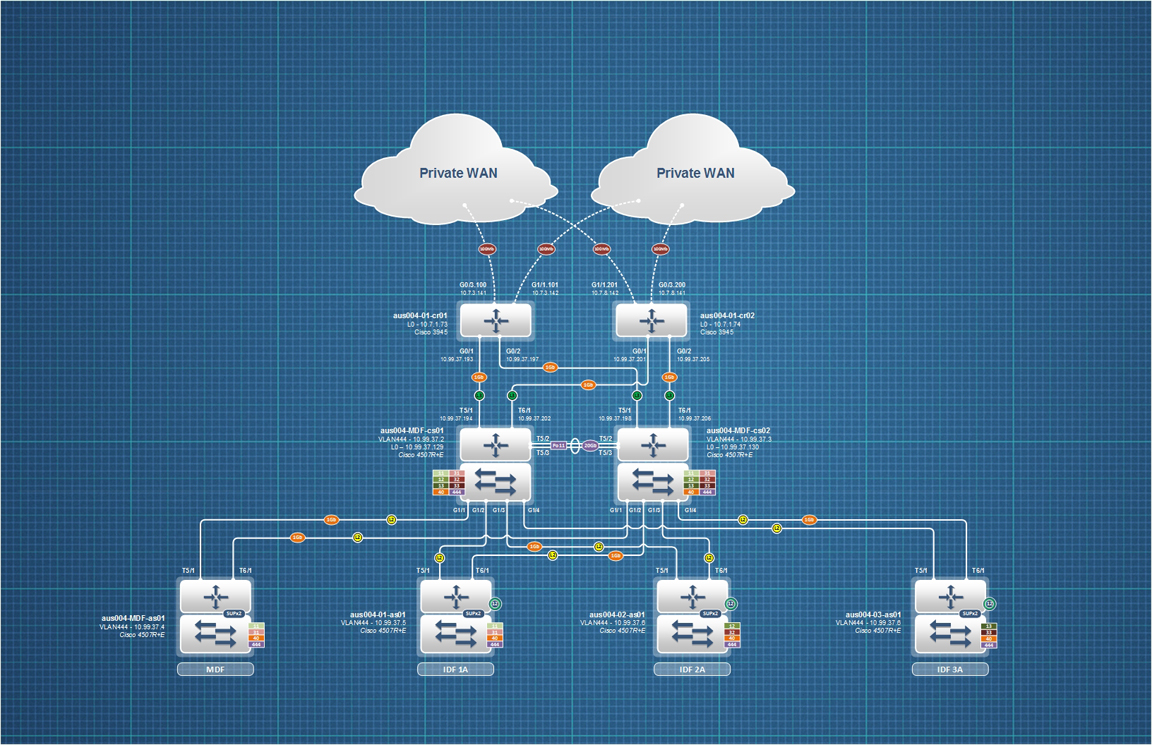
Next, add device names, management IPs, hardware type, and IOS version.
Example 15-6
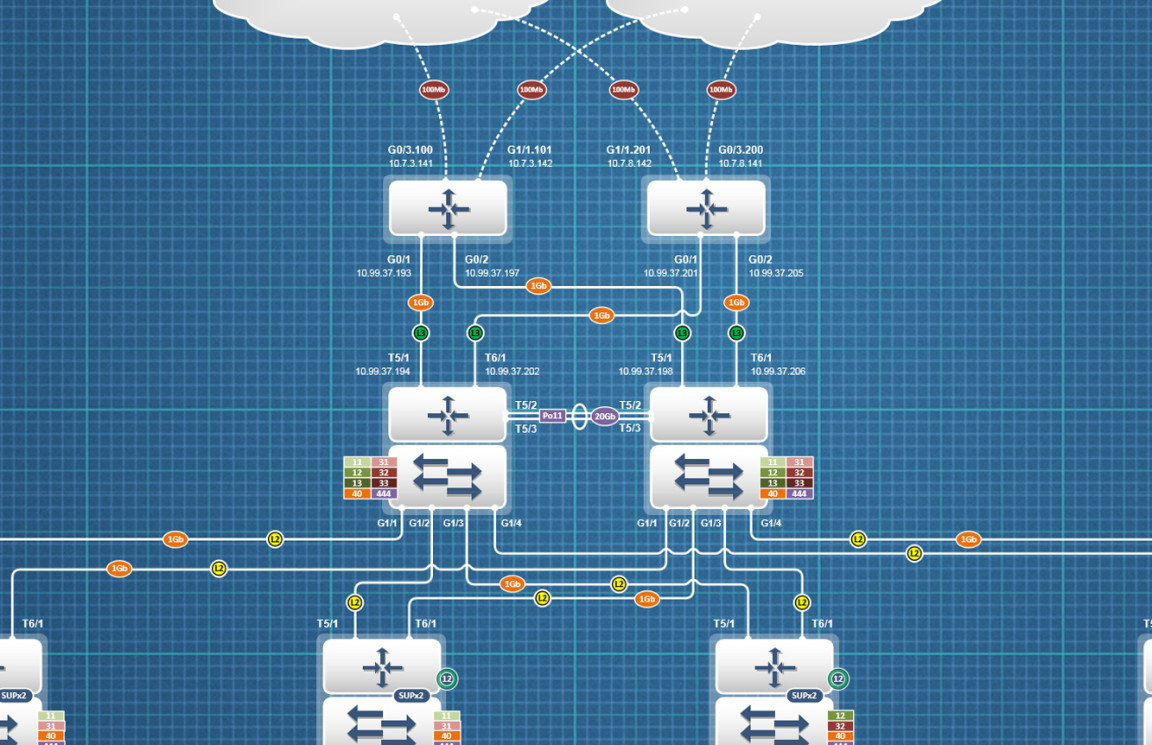
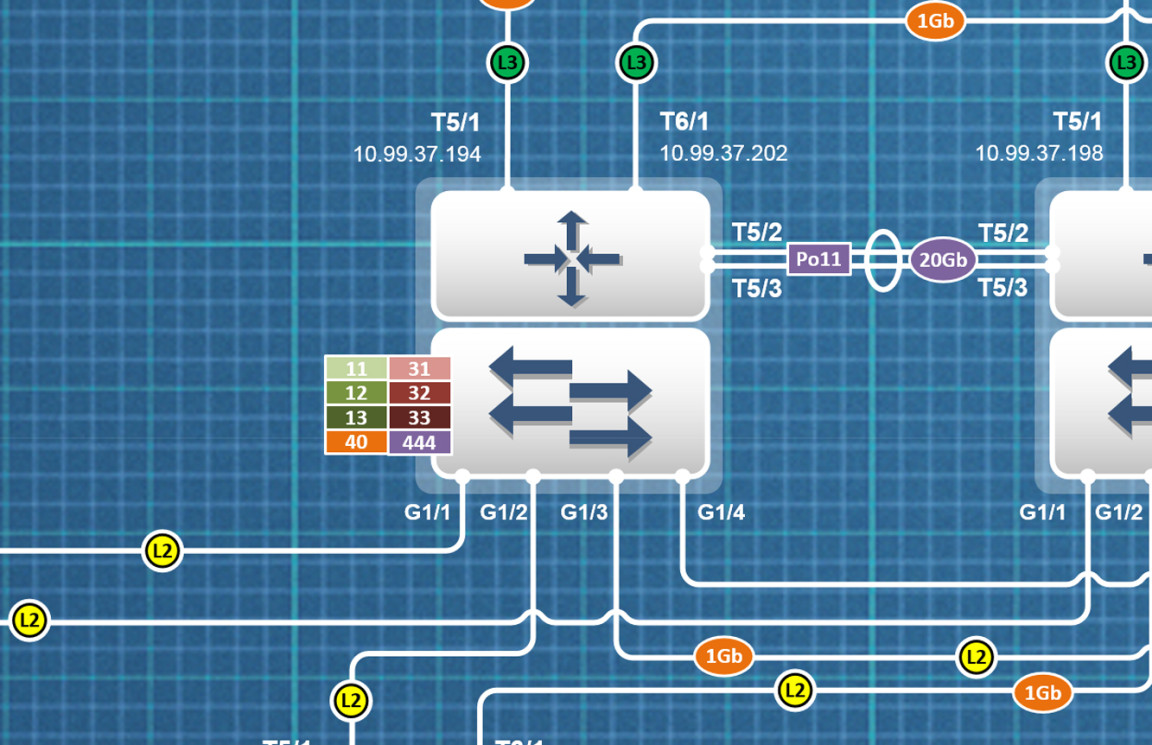
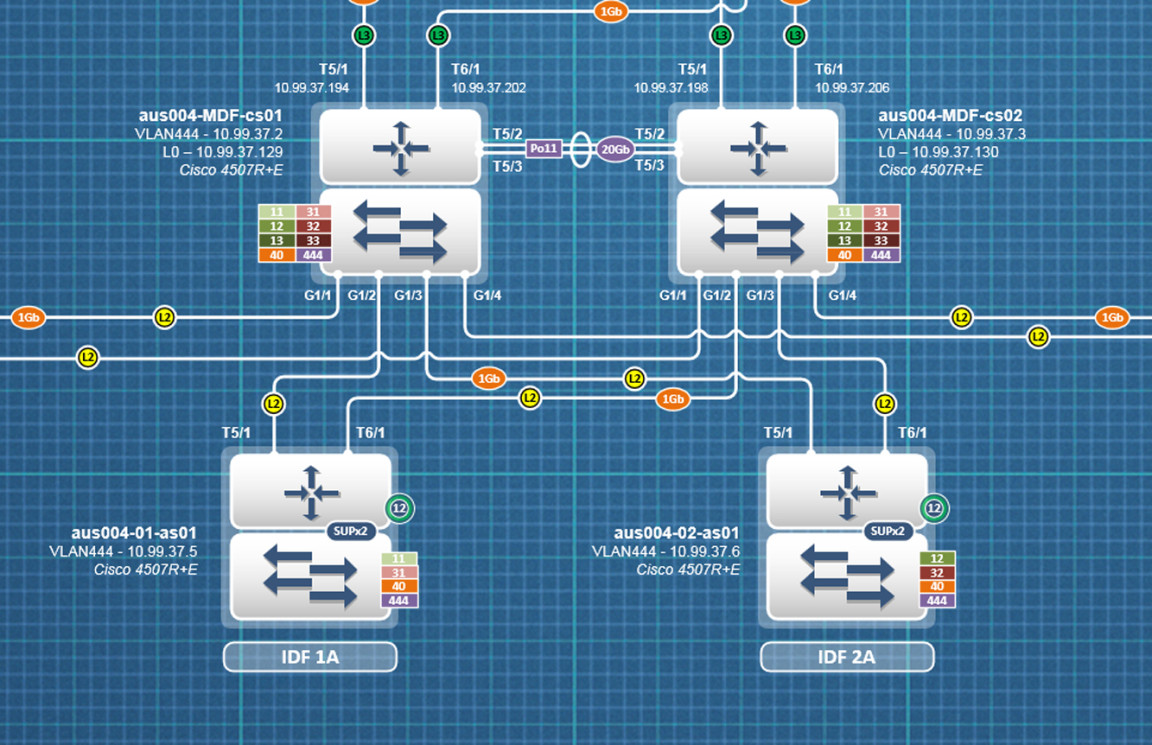
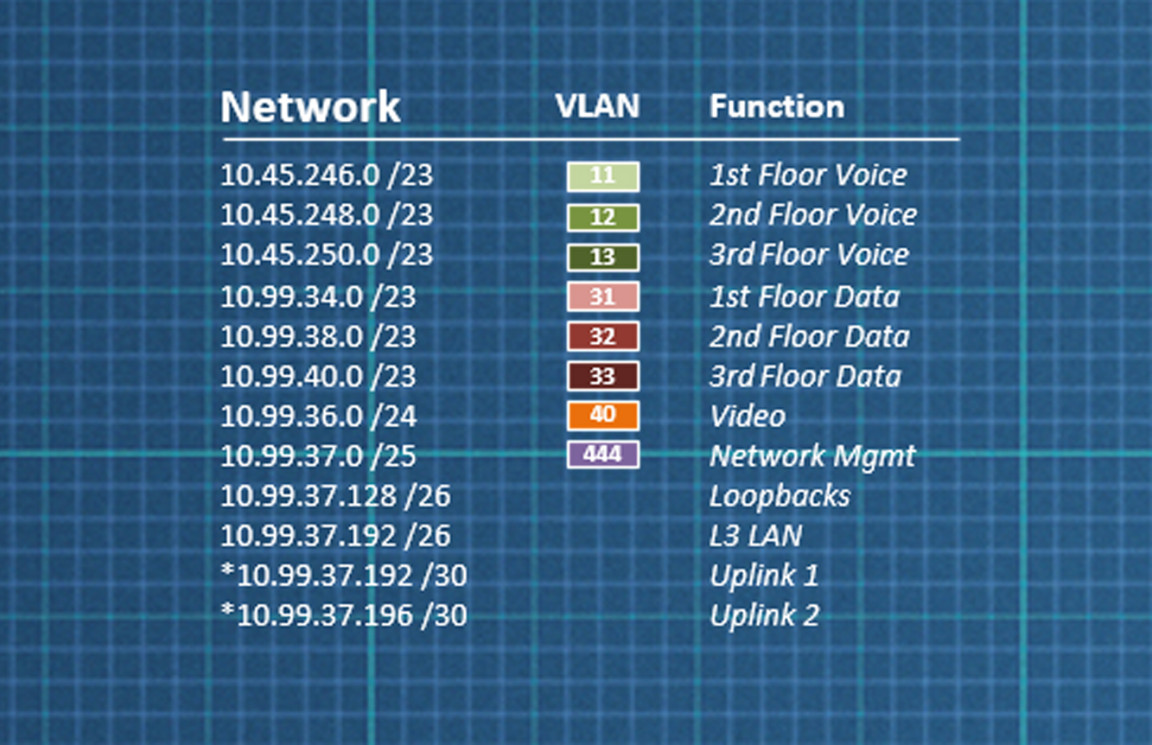
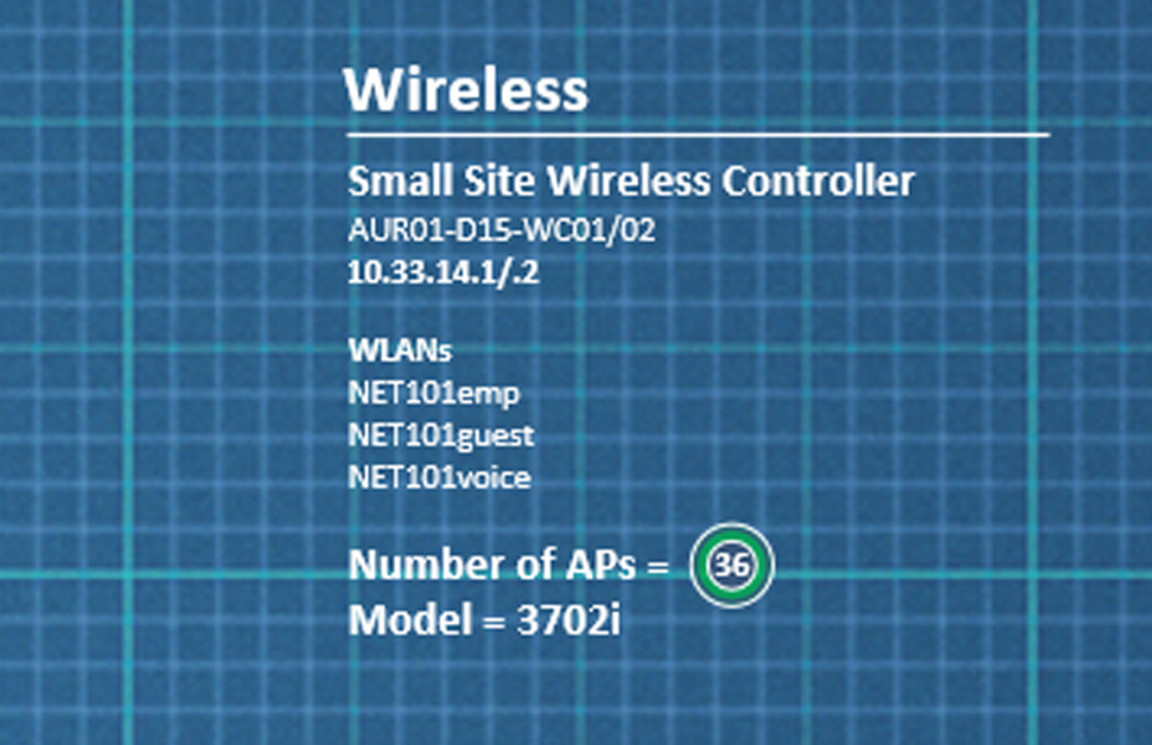
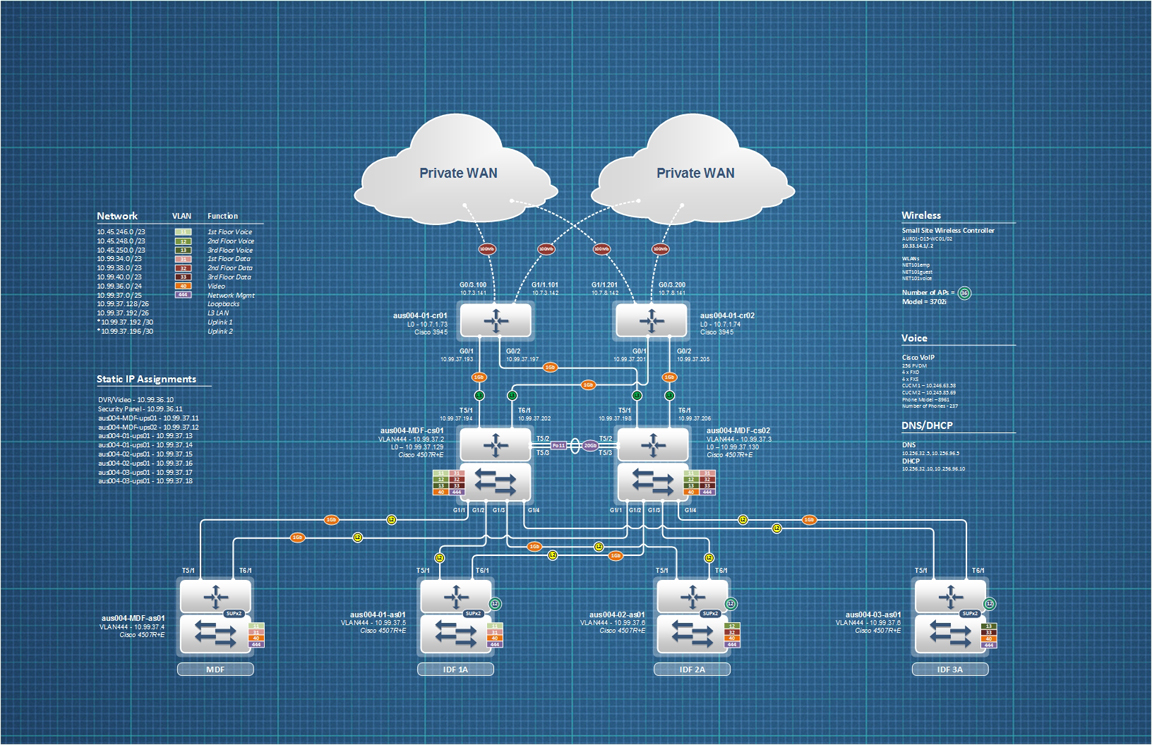
Now that you have a good idea of the remaining space around the diagram, you can drop in “information breakouts” such as VLANs, wireless, voice, and static assignments.
Example 15-7
Embellish with vendor logos.
Example 15-8
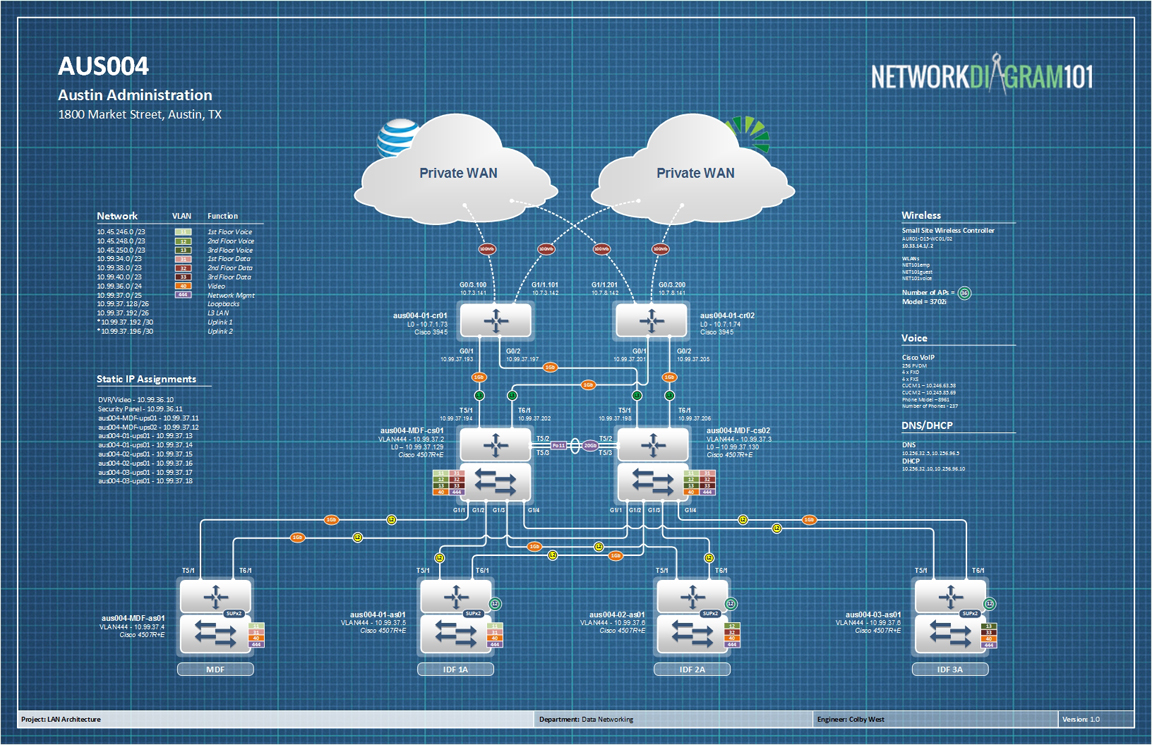
Finally, add a title, logo, and border.
Example 15-9
Full evolution.
< TIPTIP >
 Diagram Store